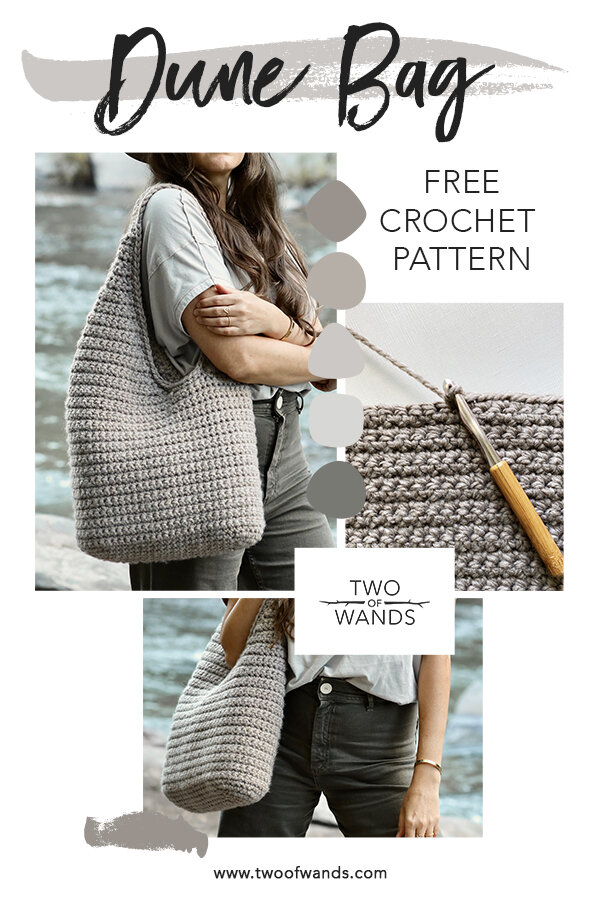
Dune Bag
I've waited all year to design this bag, and I couldn't wait to get started on it as soon as there was a hint of fall in the air. I had planned to whip it up early in the year when the cold weather was still hanging around, but spring projects (and then summer projects) quickly took over so I had to wait until now to bring the vision of the Dune Bag to life. Read on for all of the details on the inspo and for the free pattern, click here to purchase the printable ad-free PDF, or click here to grab the kit from Lion Brand.
There are some concepts I just can't get out of my head until I execute them, and the Dune Bag is definitely one of them. Although this bag is inspired by windswept sand dunes, I couldn't let go of the idea of making it a fall/winter item. I envisioned it being a soft, flexible shaped bag and that just suits a thick woolly fabric so much better than a summery tight crocheted cotton bag which tends to be a more hard, rigid fabric.
I first spotted the Driftwood color of Wool-Ease Thick & Quick at a Joann store a couple months ago and fell in love with it immediately. I love a good neutral, and this colorway is the perfect dusty, sandy, soft brownish grey to represent the Dune Bag. I grabbed four skeins and brought them home knowing exactly what they'd be used for. I couldn't wait to get through my existing WIPs to dive into it!
What started out as a quick, super easy project quickly turned tricky when I realized that getting the bag to lay on the shoulder the way I wanted it to was going to require multiple attempts. In addition to a lot of frogging along the way, I actually made the bag fully twice!
The first bag was built from a circular base and worked in continuous, spiral rounds up to the strap which was then worked in turned rows. I used a similar technique for my Huntington Carryall, but something about the asymmetric strap on the Dune Bag just didn't sit right with the change in fabric where the turned rows began. I wanted this bag to feel organic and continuous, and that distinct line at the strap just broke it up too much and took away from the fluidity. I started over with turned rounds throughout to keep the fabric consistent, but I also realized that the roundness of the bottom was causing the bag to pucker and expand in places I didn't want it to when worn, so it was back to the drawing board.
The next attempt involved an oval base to give the bag a similar width but less depth, which would help it keep its shape when worn. I had almost finished it when I realized the curve of the strap wasn't as dramatic as I wanted it to be, so I frogged once again down to the body. I finally figured out the perfect pattern with Dune Bag 4.0 the day before this design was due to Lion Brand, so in other news I can now confirm that you can make this whole bag in one day, haha!
Because I was working up until the last second, I had limited time (and limited light) to get the photos. It's always such a shame to work so hard on something and not be able to photograph it in a way that represents it nicely, so I was super nervous we would be too rushed and not get very good shots. Living in the mountains there are some beautiful settings surrounding me, but the bright greens of summer are still very present and not exactly the vibe I was going for.
After driving around for an hour with the sun dipping down, just when I was feeling super defeated we stumbled across a small rocky area along a river to pull off. The rocks and riverbed were the most beautiful greys and browns, just like the bag itself! We ended up getting some beautiful shots just as I had envisioned, and I'm so thrilled. In our hurry to get the shots we missed a very important sign that we only saw on the way back up to the car. We didn't know it at the time, but we risked our lives to get these shots, lol.
I couldn't be happier with the way this bag (and photos) finally turned out, and I know this is going to be another classic piece in my wardrobe. This is an easy level crochet pattern and the techniques involved are single crochet, sc2tog and sc3tog decreases, working flat in back and forth rows, and working in the round in both turned and continuous spiral rounds.
MATERIALS
4 skeins Lion Brand Wool-Ease Thick & Quick in Driftwood (640-554)
(super bulky, weight 6; 87yds/80m per skein)
Size US N/P/15 (10mm) crochet hook
Size US L/11 (8mm) crochet hook
Removable stitch markers
Tapestry needle
FINISHED SIZE
A Width: 14.5”/37cm
B Full length: 24”/61cm
C Depth: 4.5”/11.5cm
GAUGE
9 sts + 11 rows = 4”/10cm in single crochet
ABBREVIATIONS
*All Two of Wands patterns are written in standard US terms
Ch – chain
Rep – repeat
RS – right side
Sc – single crochet
Sc2tog – single crochet 2 together
Sc3tog – single crochet 3 together
Sk – skip
Sl st – slip stitch
St(s) – stitches(es)
WS – wrong side
Notes: Bag is worked from the bottom up first in un-joined spiral rounds for the base, then in turned rounds for the body, then in turned rows for the strap. Use a removable stitch marker to keep track of beginning of round. Each round of base increases 3 sts at either end (total of 6 sts per round). Chart is provided for base increase rounds.
Base:
With larger hook, ch 21. Refer to chart for base increase rounds or follow instructions below.
Round 1: Starting in 2nd ch from hook, sc to end of row, sc twice more into end ch (3 sts total in this ch), continue around other side of ch and starting in back of next ch, sc to end of round, sc twice into starting ch (3 sts total in this ch). Do not join here. Place marker for beginning of round and continue in un-joined, spiral rounds. (42 sts)
Round 2: 2 sc in 1st st, sc 18, 2 sc in each of next 3 sts, sc 18, 2 sc in each of last 2 sts. (48 sts)
Round 3: 2 sc in 1st st, sc 19, 2 sc in next st, (sc in next st, 2 sc in next st) two times, sc 19, (2 sc in next st, sc in next st) twice. (54 sts)
Round 4: Sc 2, 2 sc in next st, sc 20, (2 sc in next st, sc in next 2 sts) twice, 2 sc in next st, sc 20, 2 sc in next st, sc 2, 2 sc in last st. (60 sts)
Round 5: Sc 1, 2 sc in next st, sc 21, (2 sc in next st, sc in next 3 sts) twice, 2 sc in next st, sc 21, 2 sc in next st, sc 3, 2 sc in next st, sc 2. (66 sts)
Do not fasten off.
Body:
Body is worked from base in joined, turned rounds.
Round 6 (RS): (short round) Sc around to last st, turn leaving last st unworked. This marks new beginning of round, which has been moved slightly to the true side.
Round 7 (WS): Ch 1, sc around, sl st to join, pull sl st tight, turn.
Rep round 7 until body measures 10”/25.5cm from the base, ending with a WS round.
Fasten off.
Straps:
Straps are worked in turned rows.
Large side strap:
With RS facing and larger hook, count 21 sts to the right of beginning of last round, and rejoin yarn.
Row 1 (RS): Starting in same st as join, ch 1, sc 41, turn.
Rows 2-6: Ch 1, sc2tog, sc to last 2 sts of row, sc2tog, turn. (31 sts)
Row 7: Ch 1, sc2tog, sc 11, sc2tog, sc 1, sc2tog, sc 11, sc2tog, turn. (27 sts)
Row 8: Ch 1, sc across row, turn.
Row 9: Ch 1, sc2tog, sc to last 2 sts, sc2tog, turn. (25 sts)
Row 10: Ch 1, sc across row, turn.
Row 11: Ch 1, sc2tog, sc 8, sc2tog, sc 1, sc2tog, sc 8, sc2tog, turn. (21 sts)
Row 12: Ch 1, sc across row, turn.
Row 13: Ch 1, sc2tog, sc to last 2 sts, sc2tog, turn. (19 sts)
Row 14: Ch 1, sc across row, turn.
Row 15: Ch 1, sc2tog, sc 5, sc2tog, sc 1, sc2tog, sc 5, sc2tog, turn. (15 sts)
Row 16: Ch 1, sc across row, turn.
Row 17: Ch 1, sc2tog, sc to last 2 sts, sc2tog, turn. (13 sts)
Row 18: Ch 1, sc across row, turn.
Row 19: Ch 1, sc2tog, sc 2, sc2tog, sc 1, sc2tog, sc 2, sc2tog, turn. (9 sts)
Row 20: Ch 1, sc across row, turn.
Row 21: Ch 1, sc2tog, sc to last 2 sts, sc2tog, turn. (7 sts)
Row 22: Ch 1, sc across row, turn.
Row 23: Ch 1, sc2tog, sc to last 2 sts, sc2tog, turn. (5 sts)
Row 24: Ch 1, sc across row, turn.
Row 25: Ch 1, sc2tog, sc 1, sc2tog, turn. (3 sts)
Row 26: Ch 1, sc across row, turn.
Row 27: Ch 1, sc3tog. (1 st)
Fasten off.
Small side strap:
With RS facing, larger hook, and strap just worked to the right, sk 5 unworked sts along top of body of bag and rejoin yarn in next (6th) st.
Row 1 (RS): Starting in same st as join, ch 1, sc 15, turn.
Rows 2-6: Ch 1, sc2tog, sc to last 2 sts of row, sc2tog, turn. (5 sts)
Row 7: Ch 1, sc2tog, sc 1, sc2tog, turn. (3 sts)
Row 8: Ch 1, sc across row, turn.
Row 9: Ch 1, sc3tog. (1 st)
Do not turn or fasten off.
Join straps:
Change to smaller hook and ch 26, then sc into the st at the top of the right strap.
Do not turn or fasten off.
Edging:
Edging is worked in un-joined, spiral rounds.
With RS facing, sc evenly down left side of the large strap (1 st per row), across top of body to small strap (1 st per st), up the right side of the small strap (1 st per row), and across chain, then place marker for beginning of round.
Sc 1 more round, then sl st 1 and fasten off.
With RS facing, rejoin yarn at other side of strap foundation ch and work 2 rounds of sc around the other side in the same manner.
Secure and weave in all ends.
Purchase the printable, ad-free pattern here.
Purchase the kit from Lion Brand Yarn here.
Don't forget to share your projects made using Two of Wands patterns on Instagram with the hashtag #crewofwands to get featured on my page and be in the running for monthly pattern giveaways!
Check out the #crewofwands community page here.
The patterns and photographs of items on this site are the property of Two of Wands and are for personal, non-commercial use only. These patterns files are protected by US copyright, and you may not distribute or sell them electronically or physically. Small batch sales of finished pieces made from these patterns are permitted, but seller must use their own photographs and credit must be given to Two of Wands as the designer.


