Waterbury Plaid Blanket Scarf
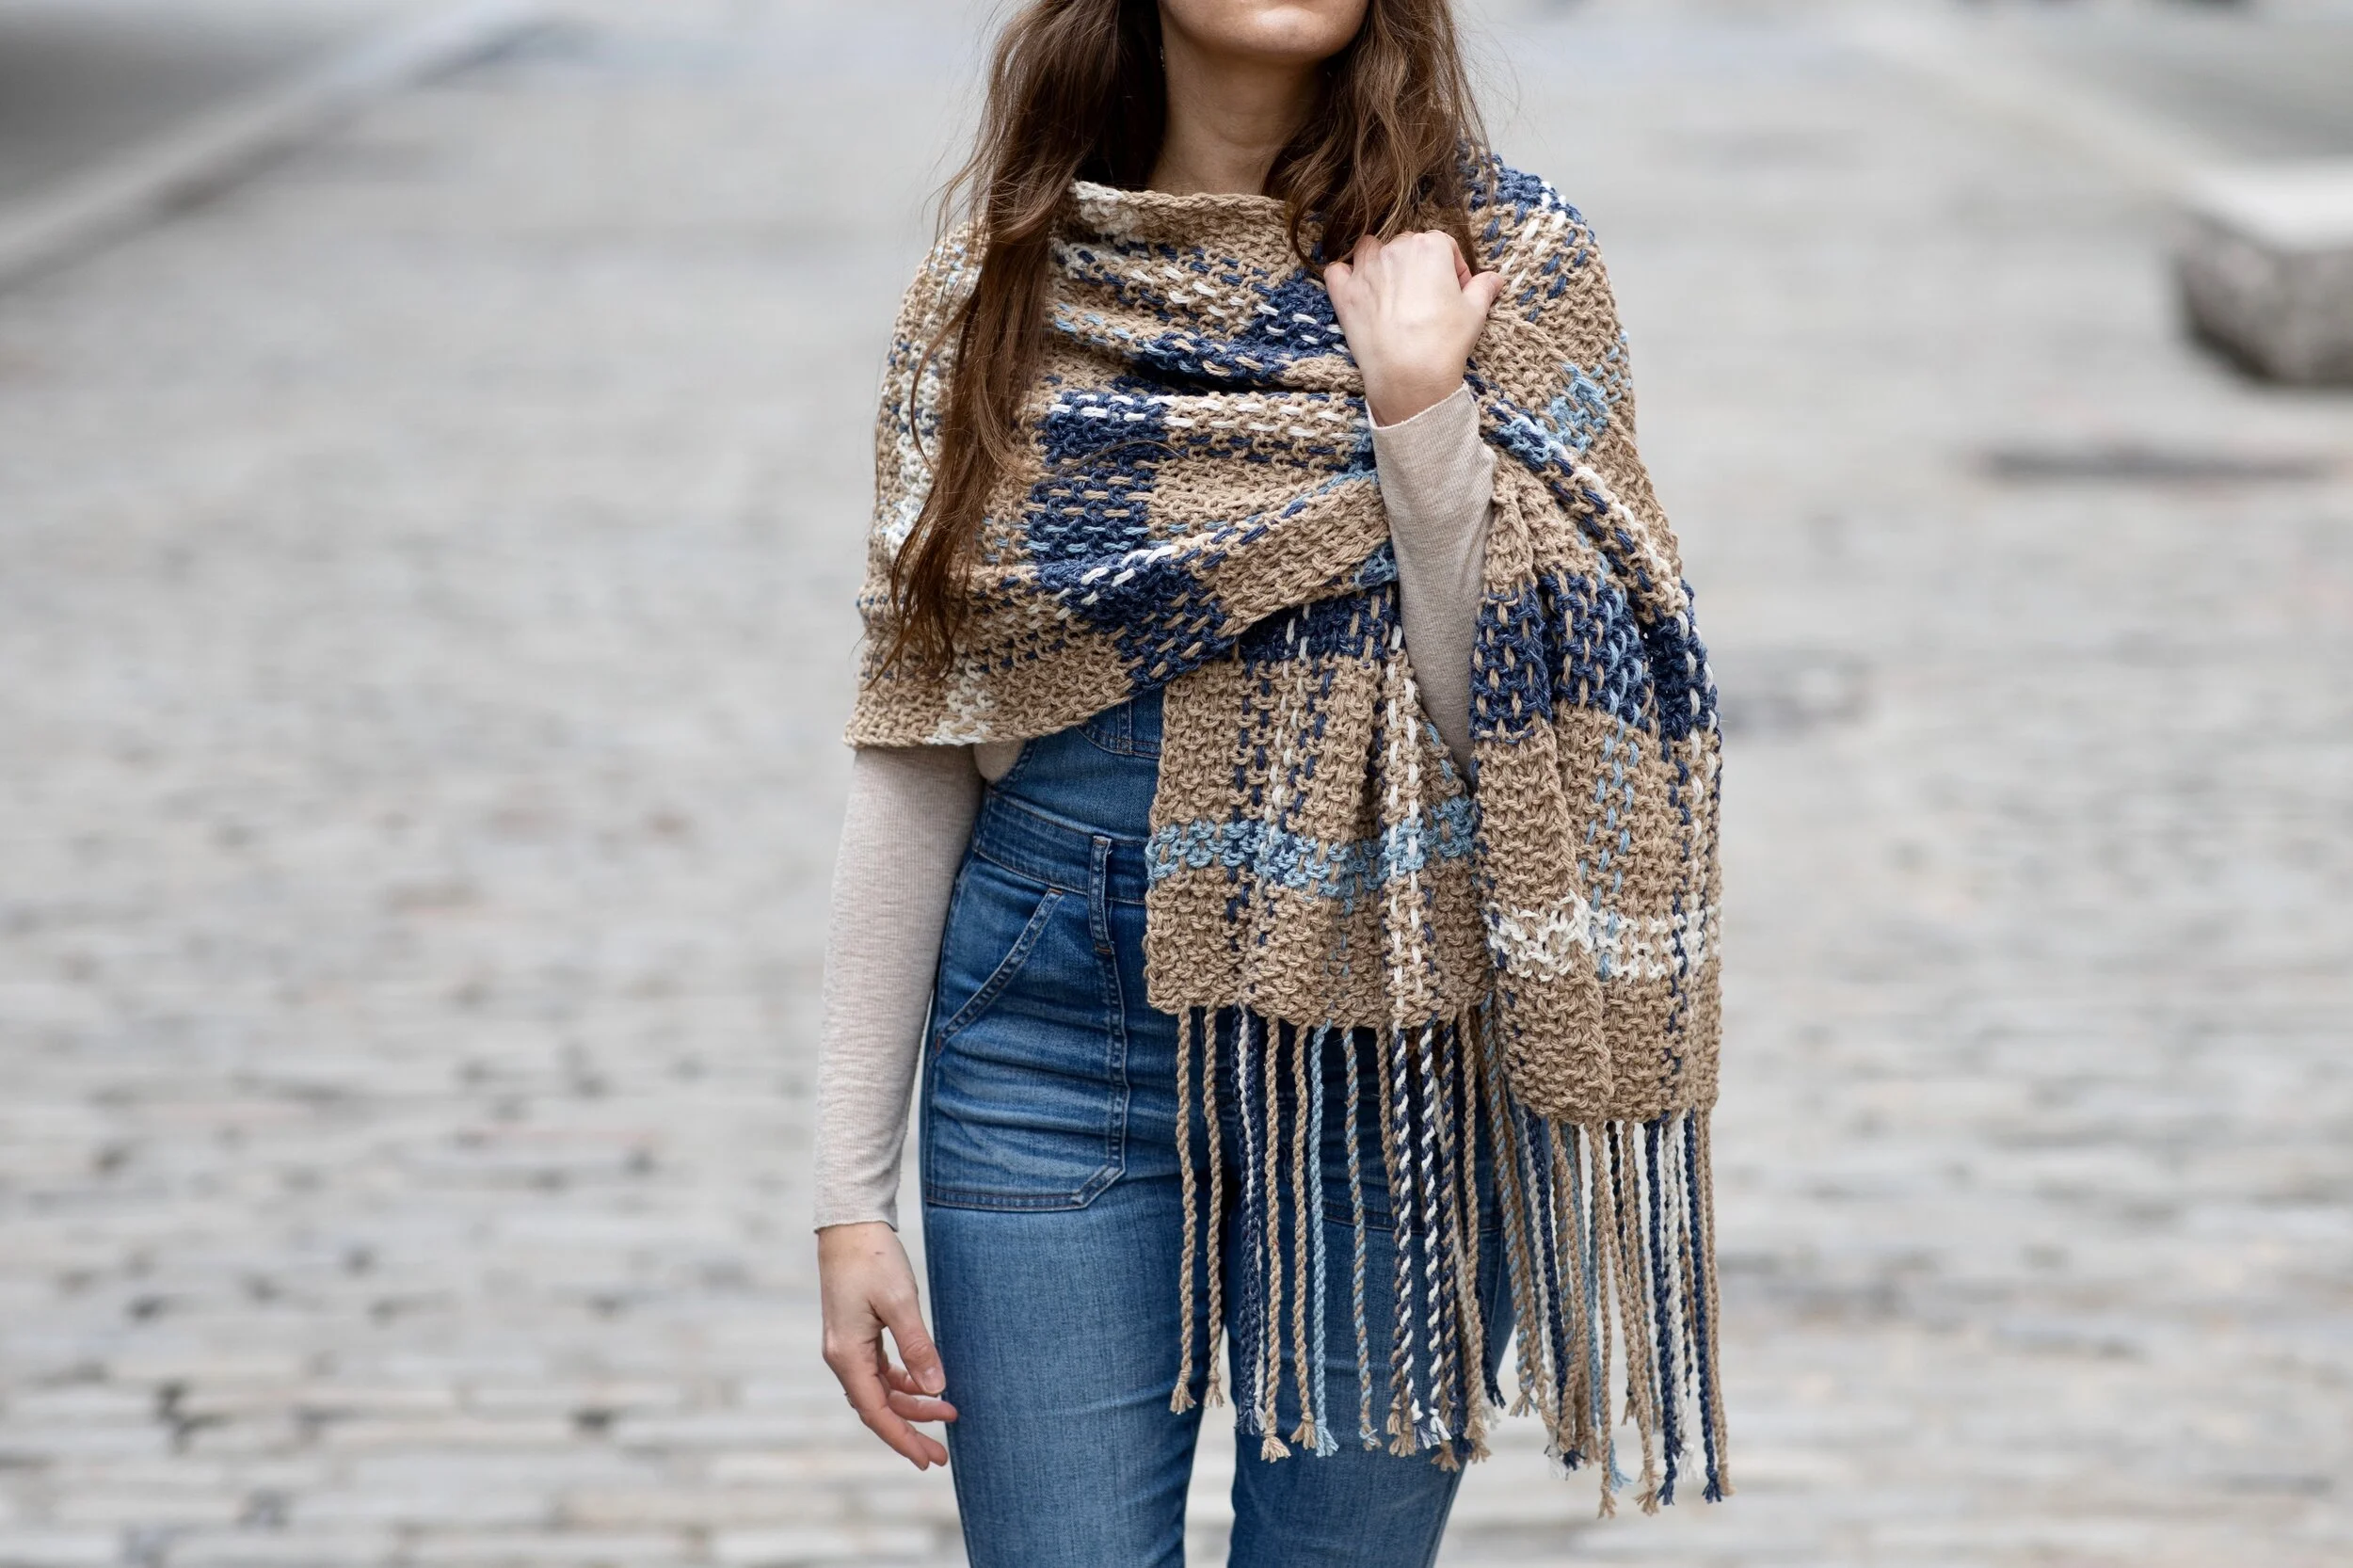
I don't think I've been this excited to release a new pattern (er, set of patterns) in a LONG time. Back in September, I was introduced to a new Lion Brand yarn called Re-Tweed and I immediately fell in love. The entire color palette is so beautiful and I knew I wanted to use as many colors as possible, so I began planning a couple of epic blanket scarves that would showcase this yarn in a dramatic and unexpected way. Scroll down for free knit Waterbury Plaid Blanket Scarf pattern (or click here for the crochet sister pattern, the Rosebridge Blanket Scarf). You can purchase a printer-friendly, ad-free PDF here or grab the full yarn kit from Lion Brand here.
The initial inspiration for this set of scarves came from the Re-Tweed yarn itself. As I mentioned above, every single color in the palette is so lovely and muted, and my favorite thing about them is that they all complement each other. You could use any combo of colors in this collection and it would work! This made it super hard to choose just one color for my latest Lion Brand collab, so I decided to choose EIGHT and split them between two blanket scarves, one knit and one crochet. I went with a warm colorstory for the crochet scarf and a cool colorstory for this knit one.
The blend of recycled wool/poly/acrylic makes this yarn feel similar to a cotton, but it retains the qualities of its actual fiber content to give it durability, lightweight properties, and a bit more spring. I noticed it softened up even more as I was working with it. The airiness of the fabric inspired me to create something loose knit and drapey, so I chose to work with larger-than-called-for needles (which, let's be honest, is something I almost always do). This also allowed the stitches to remain nice and open and spacious to accommodate the weaving.
Ever since I knit my ever popular Campfire Blanket Scarf, I've been in love with the subtle plaid effect that the fabric created. This time I took it to the next level and chose to do a full weaving technique across the entire scarf to create a gorgeous plaid/tartan effect that completely transforms the fabric. It took some decision making up front and about 37 different color charts before I got the plaid idea exactly like I wanted it, but once I had the plan in place it was easy breezy to complete this scarf!
The best thing about the Waterbury Plaid Blanket Scarf is that it only takes ONE STITCH. That's right, all you need to know is how to cast on, knit, and bind off in order to master this pattern. The weaving technique is a special process that doesn't require any special skills, AND I've created a video tutorial below that shows you exactly how to do it. I even have older tutorials that explain all of the knitting basics, so you really don't have to know anything before diving into this project. I also made a video that demonstrates the twisted rope fringe, so there's basically no excuse not to make one of these babies :)
I can't wait to see all of the color combos that you guys come up with for these scarves! I love how personalized these can become and how meaningful the color choices can be. Don't forget to tag me on social media if you share your WIPs so I can take a peek at your projects!
This is a beginner level knitting pattern and the techniques involved are the knit stitch and weaving.
MATERIALS:
3 skeins Lion Brand Re-Tweed Peanut Butter (253-122) for Color A
2 skeins Lion Brand Re-Tweed in Dutch Blue (253-108) for Color B
1 skein Lion Brand Re-Tweed in Hay (253-098) for Color C
1 skein Lion Brand Re-Tweed in Skyway (253-106) for Color D
Size US 11 (8mm) knitting needles
Tapestry needle
FINISHED SIZE:
Width: 20”/51cm
Length: 68”/173cm
GAUGE:
13 sts + 24 rows = 4”/10cm in garter stitch
ABBREVIATIONS:
*All Two of Wands patterns are written in standard US terms
CO – cast on
K – knit
Rep – repeat
Sl – slip
St(s) – stitches
Wyif – with yarn in front
Notes: Scarf is worked flat in back and forth rows. The first stitch of each row is slipped to create a clean selvedge edge. Do not carry unused color up the side of the work. Vertical stripes are woven in after knit base is complete. Fringe is twisted using a rope technique.
Base:
With color A, CO 50.
Row 1: Sl 1 purlwise wyif, K across row.
Rep row 1, changing colors as follows:
Rows 2-18: Color A.
Row 19-24: Color C.
Rows 25-42: Color A.
Rows 43-54: Color B.
Rows 55-72: Color A.
Rows 73-78: Color D.
Rows 79-96: Color A.
Rows 97-108: Color B.
Rows 109-126: Color A.
Rows 127-132: Color C.
Rows 133-150: Color A.
Rows 151-162: Color B.
Rows 163-180: Color A.
Rows 181-186: Color D.
Rows 187-204: Color A.
Rows 205-216: Color B.
Rows 217-234: Color A.
Rows 235-240: Color C.
Rows 241-258: Color A.
Rows 259-270: Color B.
Rows 271-288: Color A.
Rows 289-294: Color D.
Rows 295-312: Color A.
Secure and weave in all ends. Block work to finished dimensions.
Weaving:
Long strands are now woven vertically to create the plaid effect.
Cut the following number of 110”/279cm lengths of each color: 48 color A, 24 color B, 12 color C, and 12 color D. The best way to do this is to pull the center end out of the ball and hold it together with the outer end so you can cut two lengths at a time.
Thread two strands of color A together onto a tapestry needle. With the cast on edge at the bottom, begin weaving vertically into the first st along the left edge (the first “v” st in from the slipped st edge), going under and over two rows at a time. Pull lengths so that they are even at either end of the scarf. Thread a second double strand onto the needle and weave into the 2nd st along the left edge, this time going under and over the opposite two rows to create a woven effect. Continue with double strands of each color, following the chart below and weaving under and over opposite double rows each time.
Watch my video tutorial on how to create the plaid look:
Fringe:
Trim all strands at each end to the same length, approx. 15”/38cm.
Treat each double strand as if it were one. Starting with two leftmost double strands at one end, twist each separately in the same direction that the yarn twists until it buckles easily when you give it a little slack. Then twist the two together in the opposite direction, forming a rope. Knot at the end to secure.
Rep across entire end with two double strands at a time. Rep on other end of the scarf. Trim ends for a clean edge.
Watch my video tutorial on how to make the twisted rope fringe:
Purchase the printable, ad-free pattern here.
Purchase the kit from Lion Brand Yarn here.
Don't forget to share your projects made using Two of Wands patterns on Instagram with the hashtag #crewofwands so your post will get featured on my site and you'll be in the running for monthly pattern giveaways!
Check out the #crewofwands community page here.
The patterns and photographs of items on this site are the property of Two of Wands and are for personal, non-commercial use only. These patterns files are protected by US copyright, and you may not distribute or sell them electronically or physically. Small batch sales of finished pieces made from these patterns are permitted, but seller must use their own photographs and credit must be given to Two of Wands as the designer.

